Five Ways We Tried to Corral Our Pins (One of Them Actually Stuck)
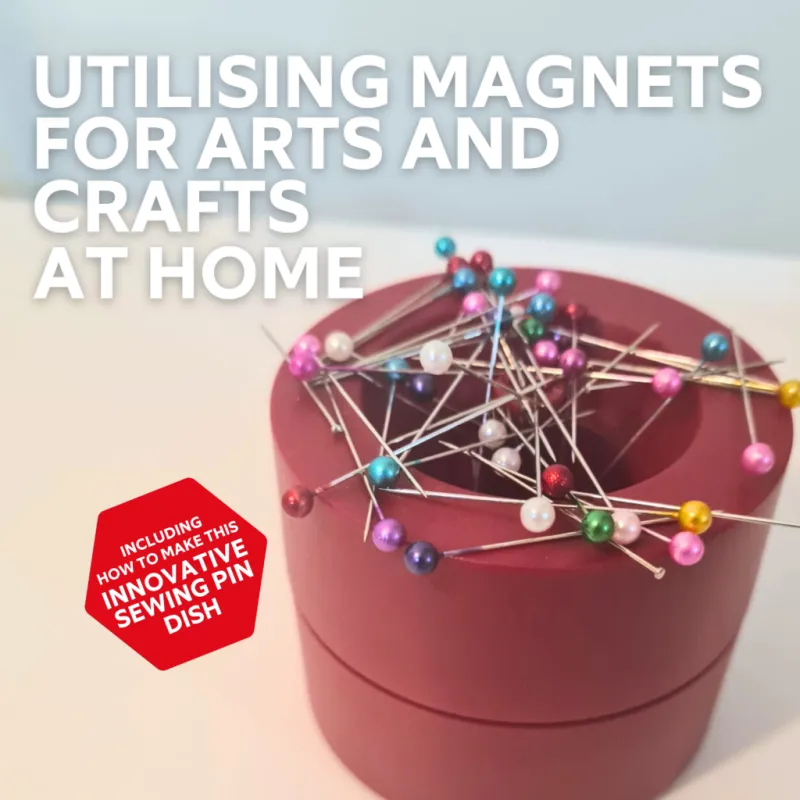
Photo: sewing pins magnetic dish organizer on cutting table, via www.first4magnets.com
Every sewist has a moment they're not proud of. Ours came on a Tuesday night in October, roughly 48 hours before the elementary school play, when our editor stepped on a pin in bare socks while carrying a half-finished cape across the studio. The cape survived. The mood did not.
That was the breaking point. Pins were migrating. Snips were vanishing. Wonder Clips were turning up in the remnant bin weeks later like lost mittens. So we did what any budget-minded sewist would do: we spent a month testing five low-cost organizing setups, ranked them, and lived with the winner through an actual deadline. Here's how it shook out.
The Rules of the Test
Each setup had to pass three checks: total cost under $30, a measurable drop in mid-project frustration, and survival of the school play costume crunch — two evenings of cape-and-tunic sewing with zero margin for error. We kept a little sticky note tally on the wall every time a pin hit the floor or a snip went missing. It got ugly.
Setup 1: The Mason Jar Classic — $4
You probably already have this. A quart jar, pins standing at attention, zero thought required. It looks charming on a shelf and costs roughly nothing.
The problem? It's a one-trip-per-project solution. Grab a pin, sew, walk back to the jar. On a garment with a hundred pin placements, that's a lot of cardio and a lot of pins that never made the return journey. Our floor-tally note read "7" by the end of week one.
Verdict: Pretty, cheap, and not actually an organizer. It's a storage unit.
Setup 2: The Magnetic Pin Dish — $12
This was the crowd favorite before testing even started. A round magnetic dish — the kind sold for holding screws at the hardware store — grabs pins with a satisfying clink and keeps them from scattering when you set the dish down hard.
In practice? Genuinely great. Sweeping the table at the end of a session and hearing every pin snap to the dish felt like a small magic trick. The one catch: magnets and your sewing machine do not mix. Keep the dish at least a foot from any electronic machine, and never set it on your needle plate.
Verdict: A strong runner-up. Frustration dropped immediately. Cost us one near-miss with the computerized machine before we set a rule about it.
Setup 3: The Wrist Pincushion — $8
The wrist pincushion promises pins travel with you, and it delivered — for about forty minutes. Then it started to feel like a very determined bracelet, and the pins on the wrist side tended to migrate into skin during any moment of enthusiasm.
If you're a hand-sewing-first person, this might be your tool. For machine-heavy garment work, it spent more time on the table than on the arm.
Verdict: Fine, occasionally stabby, not the answer to table chaos.
Setup 4: The $25 Commitment Tray — $27
This is the setup the whole month was really about: a shallow metal tray — we found a steel tool tray in the hardware aisle — lined with a magnetic sheet, holding the pin dish, a small cup of Wonder Clips, the snips on a lanyard, a seam ripper, and a tape measure. Everything lives in the tray. Everything goes back in the tray. One object to put away at the end of the night.
It sounds fussy. It is not. The tray became a habit within three sessions because the rule is stupidly simple: if it's not in the tray, it doesn't exist. The "everything has one home" effect worked on us the way a clean kitchen counter works on dinner cooking — it just made the whole session calmer.
And it passed the real test. During the school play crunch, we sewed two full evenings, finished a lined cape and a tunic, and the final floor-pin count was zero. We checked. Twice. With a flashlight.
Verdict: Winner. Cost about $27 all-in, and the snips-on-a-lanyard trick alone was worth half of that.
Setup 5: The DIY Fabric Bowl and Scrap-Pile Approach — Free
For fairness, we also tried the pure zero-cost method: a fabric bowl made from two ten-inch squares of cotton, right sides together, sewn around, turned, and topstitched. Fill it with pins. Everything else just... lives wherever.
The bowl itself is lovely and takes fifteen minutes to make — genuinely a good scrap-buster and a nice beginner project. But "everything else lives wherever" is the exact behavior that started this experiment. Our floor tally climbed back into double digits.
Verdict: The bowl earns its keep as a pin dish, but the system around it was the missing piece.
The Takeaway: It Was Never About the Pins
Here's the thing we didn't expect: the winning setup wasn't really about containing pins. It was about ending each session with one motion — everything back in the tray, tray on the shelf — instead of a ten-minute scavenger hunt the next time we sat down.
If you're assembling your own version, the recipe is simple: a shallow tray with a lip, a magnetic dish for the pins, a cup for clips, snips tethered to something, and the discipline to put it all back. Total damage: under $30, or less if you source the tray from the garage.
Our sock-wearing editor has not been stabbed since. That's a review you can't buy.